Dryers
Dryer Leaking Water? Why Condensation Runs Back Down
Dryer leaking water from the bottom? Why vent condensation runs back down from Florida roof vents, how to rule out the washer, and what to check first.
By Jax Appliance Pros · · 7 min read
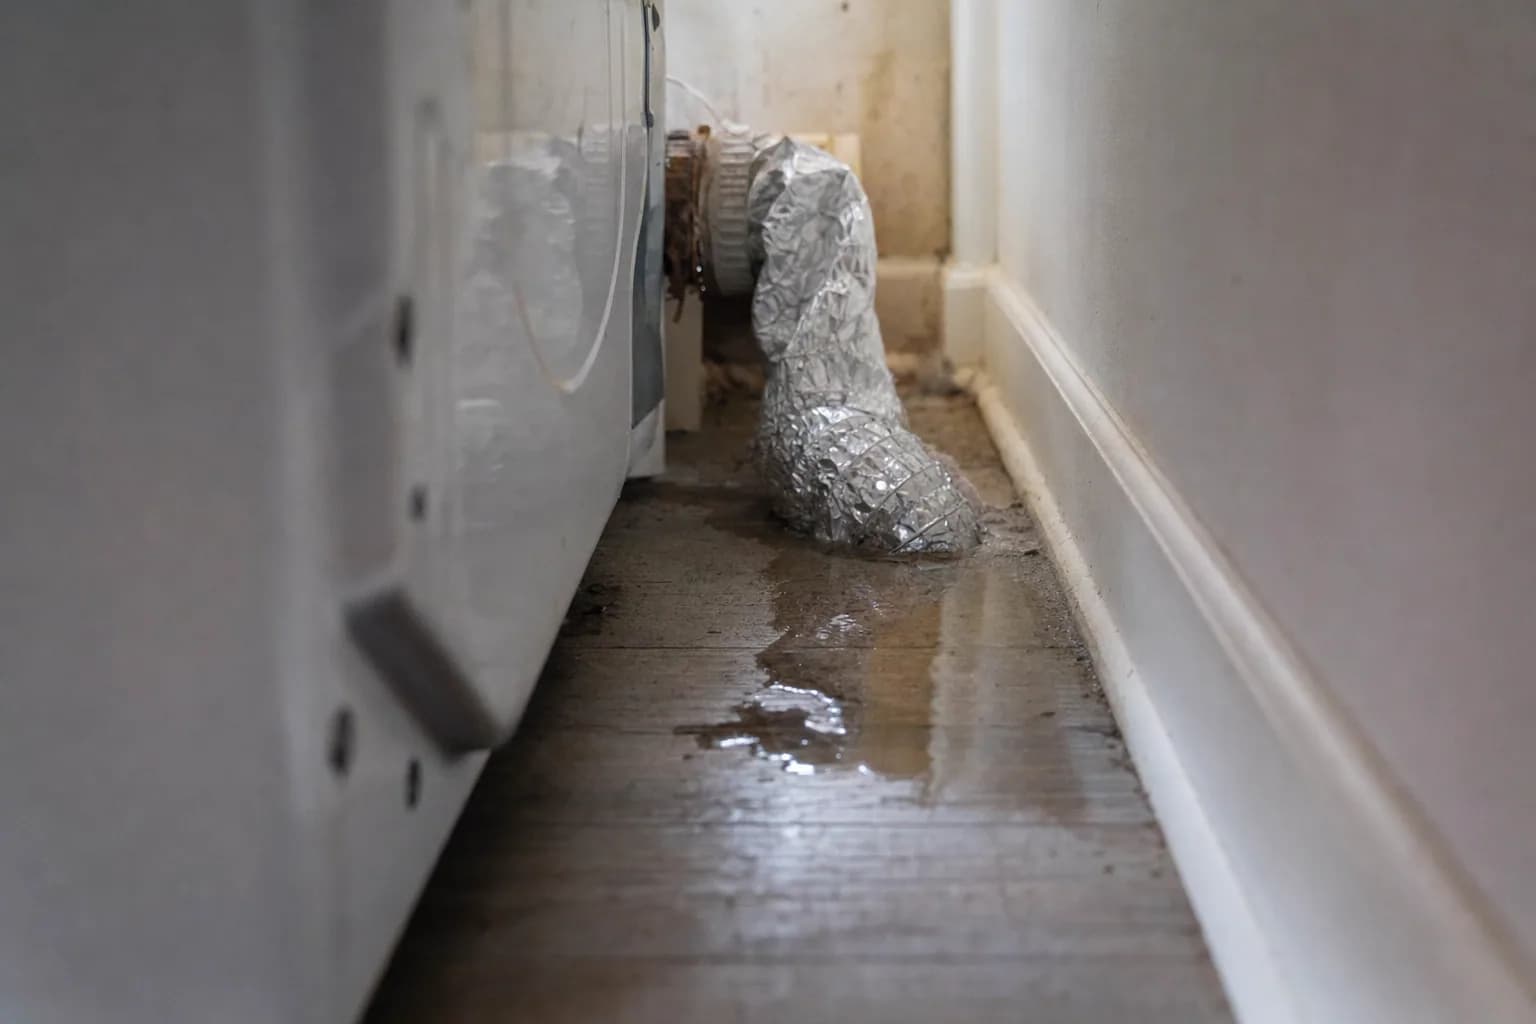
A dryer leaking water is rarely a leak inside the dryer itself. On a standard vented dryer, the water is usually condensation from the exhaust vent running back down into the machine, and the next most common source is the washer beside it. Steam dryers, which connect to a water line, and condenser or heat-pump dryers, which collect water on purpose, have a few causes of their own.
Water and 240 volts do not mix. If water has reached the outlet, the cord or the floor around the dryer, switch off the dryer's breaker before you touch anything. The CPSC warns not to touch wet appliances that are still plugged in. Unplug the dryer before you pull it out, and if it is a gas dryer, never bend or disconnect the gas line. If you smell gas, do not touch any switches; leave the house and call the gas utility or 911 from outside.
Dryer leaking water? Checks you can do yourself
- Make it safe. Switch off the breaker or unplug the dryer, and dry the floor completely.
- Run each machine alone. With the dryer off, run the washer through a drain and spin and watch the floor. Then, with the washer off, run the empty dryer on a heated cycle for 15 minutes. The machine that makes the puddle is the one to fix.
- Check the vent connection. With the dryer unplugged, pull it out and look at the duct where it joins the dryer and the wall. Drips, rust streaks or wet, pasty lint at a joint mean water is coming down the vent.
- Look for sags and crushed duct. A duct that droops between the dryer and the wall holds water in the low spot, and thin foil duct crushes easily. Replace it with 4-inch rigid or semi-rigid metal duct.
- Check the outside hood, if you can reach it from the ground. The flap should open freely while the dryer runs. GE says never to install a screen or grid of any kind in or over the exhaust. Do not climb onto the roof to check a roof cap.
- Clean the lint screen. A clogged screen slows the air and adds to condensation.
- On a steam dryer, check the water hose. Look for drips at both ends of the fill hose.
- On a ventless dryer, check the water tank and drain hose. Make sure the tank is seated and the drain hose is not kinked.
Why condensation comes back down the vent
The air leaving a dryer is hot and full of water from the clothes. As it travels through the duct it cools, and when it cools enough, that water condenses on the inside of the duct. Whirlpool says that when moisture is not released outside, it can accumulate inside the dryer or the venting and cause puddles on the floor, usually behind the dryer.
That is a very First Coast problem. In many homes here the dryer vent does not go straight out a wall. It runs up through the attic, which is hot and humid on a summer afternoon but much cooler at night and in winter, to a cap on the roof, often a long way from the laundry room and with several elbows. The longer the run, the more the air cools and slows before it gets out, and slow air drops lint that holds even more moisture. On a vent that rises to the roof, whatever condenses has only one way to go: down the pipe and back into the dryer, where it drips out underneath.
LG's installation guidance says to insulate ductwork that runs through unheated areas to reduce condensation and lint buildup. GE says venting straight up through the roof is acceptable but that venting through an outside wall is better. The same restriction is why a dryer takes forever to dry, so if you are seeing both, the vent is almost certainly the cause.
Vent sags, dips and a blocked roof cap
Water collects wherever the duct has a low spot: a sag in flexible duct behind the dryer, a dip where the duct crosses attic framing, or a joint that has pulled apart in the attic. At the top, a roof cap clogged with lint, a bird's nest or a screen keeps the air from leaving, which means more condensation in the pipe. A roof cap with a broken flap can also let rain in.
Long runs and roof vents are not a do-it-yourself job. Have them inspected and cleaned by a professional. Samsung recommends having the exhaust vent cleaned once or twice a year, and in a humid climate with a roof vent, the more frequent end of that range makes sense. Every dryer repair we do includes a vent airflow check, so you will know whether the vent is restricted.
Dryer leaking water from the bottom
Water on the floor under the front or sides of a vented dryer usually traces back to one of three things: condensation that ran down the vent and out through the dryer, a steam dryer's water supply, or water that actually came from the washer and ran under the dryer. Check 2 above separates them.
Is it really the washer?
Washers and dryers sit side by side, so a washer leak often shows up under the dryer. If the puddle appears while the washer drains or spins, or the floor is wet on the washer side first, the washer is the source: a drain hose, a pump, a door boot or a tub seal. Our guide to a washer leaking from the bottom walks through it.
Condenser and heat-pump dryers
Ventless dryers do not send moisture outside, so they collect it. GE says its ventless condenser dryers either hold the water in a removable tank that you empty, or drain it through a hose into a standpipe or laundry sink. GE also says not to push the drain hose more than 4 inches into the standpipe, because pushing it farther can cause leaking. Whirlpool says to make sure the water tank on its compact heat-pump dryers is properly inserted after you empty it. If the tank is seated, the hose is clear and water still escapes, the dryer needs service.
Steam dryers
Steam dryers connect to a water faucet with a fill hose. Samsung says to inspect the water supply hose for cracks and holes and to make sure both ends have undamaged gaskets or O-rings, and Whirlpool says both ends of the inlet hoses need their hose washers and tight connections. A few drops are normal; Whirlpool notes that steam can condense on the door and drip when you open it. Samsung says water leaking into the drum from the steam system when steam is not in use needs service, and that usually means the water inlet valve.
What usually fails
- The vent. Not a part, but the most common cause of a dryer leaking water. It needs cleaning, re-sloping or rerouting, not a new dryer.
- Steam water inlet valve or fill hose. Water in the drum when steam is off, or drips at the back.
- Ventless drain parts or tank. Water under a condenser or heat-pump dryer even with the tank seated.
- The washer. A drain pump, hose, door boot or tub seal next door.
What it costs in Jacksonville
The diagnostic is $79 and is waived when you approve the repair. Dryer repairs start at $179 labor plus parts, and you get a written flat-rate estimate before any work begins. Typical dryer repairs run $180 to $320 all in on standard brands. Every dryer repair includes a vent airflow check. Many repairs can be finished on the first visit, and every repair carries our 90-day parts-and-labor warranty. See our pricing.
Schedule dryer repair or call (904) 561-4790 for same-day service across Jacksonville & the First Coast.
About Jax Appliance Pros
Locally owned appliance repair for Jacksonville, the Beaches, St. Johns, Clay and Nassau counties. Same-day or next-day service on refrigerators, washers, dryers, dishwashers, ovens, cooktops, ranges and garbage disposals. $79 diagnostic waived with the repair, 90-day parts-and-labor warranty. Insured. More about us.